If you’re looking to achieve the perfect lawn, sod installation is a quick and effective way to achieve that lush and vibrant green carpet under your feet. However, before you begin laying down the turf, it’s essential to know how to prepare the ground for sod properly.
In this comprehensive guide, we will explain step by step how to prepare the ground for sod installation.

Test Your Soil
Testing your soil is an essential first step when preparing for sod installation. This process determines the soil’s pH, nutrient content, and composition.
Knowing your soil type and its structure can help you determine the best approach to your sod installation.
Purchase an inexpensive soil test kit or send a sample to a local lab for comprehensive analysis.
Clear the Site
Before starting, it’s essential to clear the area of any unwanted weeds, debris, large rocks, or tree roots. Remove any existing grass by using a sod cutter.
Read one of our other articles that explains how to remove grass before laying sod.
Level Ground for Sod

Level the soil by raking it and removing any high spots to ensure an even and flat surface. Add topsoil to level uneven areas.
Check that the soil is slightly below the edges of any existing hardscaping or sprinklers to prevent water runoff. Shoot for about 1 inch below those items.
Womble (n.d.) use an iron rake to knock down any high spots and fill in low spots so the soil is level and 1 inch below the grade of any paved surface, such as a walkway or driveway. Water lightly to dampen the soil.
Amend the Soil
Amend the soil according to the results of the soil test. Apply any necessary soil amendments such as lime, sulfur, nitrogen, or phosphorus.

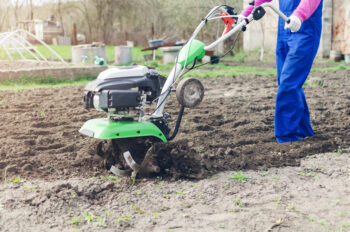
Rototill the Soil
Womble (n.d.) do I need to rototill before laying sod? Yes, unless it’s a small area.
Use a rotary tiller to mix the amendments into the soil to a depth of 4-6 inches.
Fertilize the Soil
Fertilize the soil with a starter fertilizer designed for new seedlings. This step encourages deeper root growth and establishment. Choose a slow-release fertilizer, blend it into the soil, and water the area thoroughly.
Compact the Soil
After amending and fertilizing the soil, compact the soil using a lawn roller for an even surface. Water the area lightly to help settle the soil.
Home Depot (n.d.)
- If you don’t want to rent a lawn roller, you can DIY this step: Use a large piece of plywood to press down sod instead. Carefully walk over the wood to evenly embed the sod into the soil’s surface.
Tip: If heavy rain fell during or after installation, don’t use a roller. The soft ground will already accept the sod easily then. Rolling it could also shift the sod in the mud, undoing your hard work.
Install the Sod

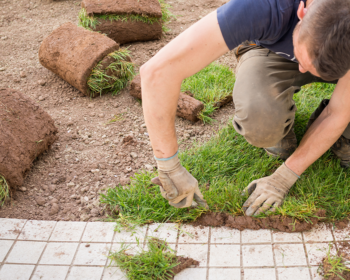
Once the soil is prepared, it’s time to install the sod. Begin laying the sod perpendicular to any hardscaping or borders and the slopes of the land.
Work your way across the entire area while ensuring the sod pieces are tightly butted together. After installation, roll the sod to eliminate air pockets and water the newly installed sod generously.
Maintain the Sod
The final step is to maintain your newly installed sod. Water the sod frequently to keep it moist until it is fully established, which usually takes two to four weeks.
Avoid mowing the sod until the blades have reached a height of 3-4 inches.
For more new sod care tips read, “How to Prevent New Weeds from Growing in New Sod.”
Wrapping Up
By following these steps, you will prepare the ground for successful sod installation and create a healthy lawn for you and your family to enjoy.
Remember that proper maintenance, such as regular watering and fertilizing, is essential for maintaining a healthy lawn year-round. Contact Ryno Lawn Care professionals for assistance with sod installation and lawn care services.
References
Home Depot. (n.d.). How to lay sod. Home Depot. https://www.homedepot.com/c/ah/how-to-lay-sod/9ba683603be9fa5395fab90b32edd1e
Womble, A. (n.d.) How to lay sod in 7 easy steps. This Old House. https://www.thisoldhouse.com/gardening/21015374/how-to-lay-sod

